
With spring just around the corner, I'm finding myself getting more and more excited for my herb garden this year. As any serious cook can tell you growing your own herbs is one of the easiest tricks to increase the flavor of your cooking. While I try to keep fresh herbs like basil or cilantro in my windowsill year-round, I always plant a chef's herb garden during the summer months and dry herbs for my pantry.
Basil as an herb works well both in its delicious fresh form but also in a dried capacity, especially in soups, stews, and sauces. This baked feta pasta recipe for instance calls for fresh basil but in a pinch, you can absolutely use dried basil if that's all you have on hand. By drying your own basil you are able to take that flavor to the next level, and also get the feeling of keeping your pantry hyper-local.
Whether your drying fresh basil from your garden or excess basil from your local grocery store, there are definitely some steps you should take to help you achieve the highest quality dried basil possible.
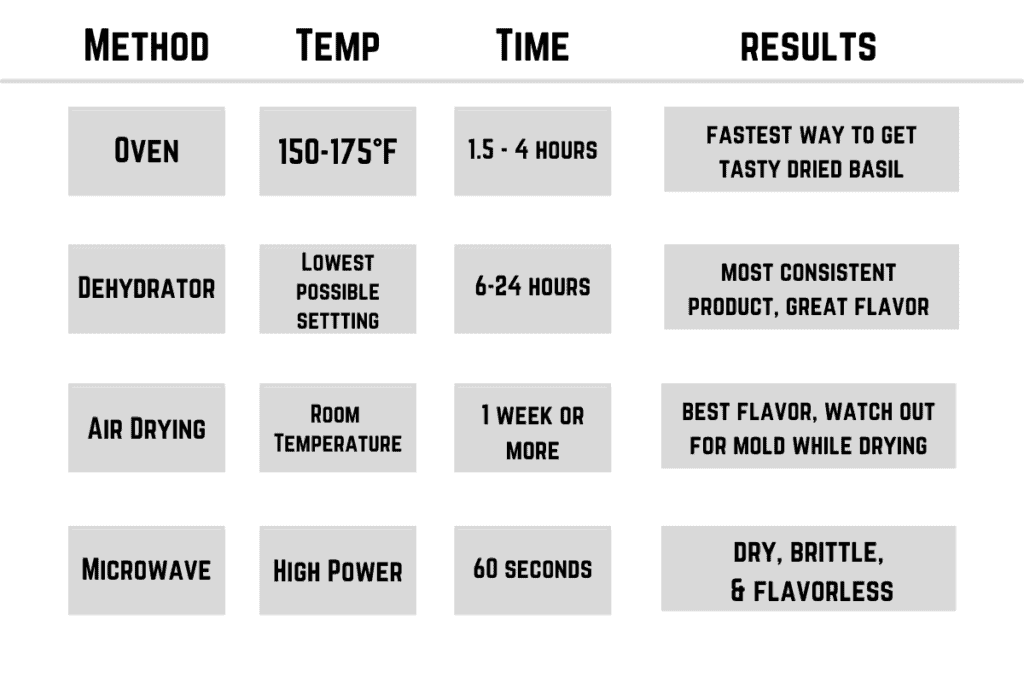
Table of Contents
How to dry basil quickly.
Drying basil can be done in several different ways depending on your timetable. Some methods like oven drying take less time but sacrifice the flavor. Others like air drying take the longest but will yield the highest quality dried basil possible.
How to oven-dry fresh basil leaves.
The fastest most consistent way to dry basil quickly will be in an oven, ideally a convection oven. Follow these steps and you'll get the most out of your dried basil in the shortest possible time.
1. Remove the basil leaves from the stem.
Because the basil leaves and the stem have different densities and moisture content they will dry at different rates. Carefully remove the basil leaves, making sure not to bruise them before moving forward with the drying process.
The basil stems have a ton of great flavor, don't discard them simply dry them separately from the basil leaves and then combine them when they are both completely dry.
2. Arrange the basil leaves on a parchment-lined baking sheet.
Make sure not to overlap the leaves as much as possible. Any place where the basil leaves overlap you will find the bottom layer of leaves will be under-dried compared to the rest of the basil. If you need to prepare multiple trays because of the number of basil leaves you are drying this is far better than over-drying parts of the basil to fully dry the rest.
3. Use a cooling rack to keep the basil secure while it dries.
This is only really necessary if you are drying your basil leaves in a convection oven. A convection oven will help keep the air circulating allowing the basil to dry even more quickly but as the basil leaves become lighter and brittle they may fly away, wasting all your hard work. A cooling rack will help keep the basil secure while it dries without impeding the air currents or drying process.
4. Cook the basil on the temperature setting possible for 1-4 hours.
Depending on what the lowest heat setting on your oven is you'll need to adjust the drying time. Ovens with convention fans will dry faster, while traditional still ovens will take a bit longer.
5. Store your dried basil in an airtight container.
Once the basil leaves are fully dried you can store them whole or chop them to your desired consistency. Store the basil in an airtight container in a dark cool place like a cabinet or drawer. The basil will stay fresh for up to 6 months before beginning to lose its flavor.
Other ways to dry fresh basil.
Whether you want to preserve all the fresh basil taste you can or put a food dehydrator to good use the are definitely some other great ways to dry basil leaves beyond using your oven.
Drying Basil in a Food Dehydrator
Whether you have a stand-alone food dehydrator at home or an air fryer that can double as one, either will work great for drying fresh basil leaves effectively.
Thanks to the high-powered fan, great air circulation, and consistent heating of a dehydrator you can hone in on the perfect lower temperatures for drying fresh herbs while maintaining as much flavor as possible. Because ovens typically have a higher temperature range than a food dehydrator there is a strong chance that in drying your basil you might cook away some of the delicious basil flavors you are trying to preserve.
As the basil leaves dries at higher temperatures some of the essential oils and flavor compounds that give it that distinct basil flavor can cook away. This is a common problem when drying any herb, but especially when drying more delicate herbs like basil, cilantro, or parsley. Thanks to the fine temperature control available on food dehydrators you can largely avoid this issue while maintaining a ton of great herb flavor.
To dry your basil in a dehydrator simply separate the leaves from the basil stems and place them in separate dehydrator trays. It's key to separate the basil stems and leaves when drying to ensure they both dry completely.
Load or stack the dehydrator trays into the dehydrator and set it to the herb drying setting. Follow the time and temperature guides for drying fresh herbs. Once your basil leaves are dried store them in air-tight containers or food storage bags in a cool dark place until needed for a recipe.
How to air dry basil?
The hands-down best way to dry summer basil while preserving the most delicious basil flavor is by air drying. This is however the longest time investment of all the methods discussed here. Air drying basil will take days or weeks compared to the hours involved in the other methods in this article, but if you have space and time it's well worth it.
Usually, when I air dry my herbs, I like to fasten the herbs together by their stem and hang them upside down from my ceiling. This keeps the herbs out of the way while promoting even drying as the warm air in my kitchen rises. After a week or two, the herbs will be fully dried and I can retrieve them before storing them for later use. This works well with hardier herbs like thyme, rosemary, and oregano.
With more delicate herbs like basil, cilantro, parsley, and mint, it's best to use drying racks or to dry the herbs when laying flat. If you tried hanging them but the stem they would fall apart as they dried and became brittle. If you have a lot of space or an extra room you can set up tables and dry the basil between paper towels. However, if space is at a premium I would recommend a hanging, collapsible drying rack.
When air drying basil I don't worry as much about removing the stem, because of the longer drying time by the time the leaves are dry the stems have most likely dried fully as well. Once the basil is fully dried you can chop it to your desired consistency or simply store it whole in air-tight storage containers.
Can you dry basil in the microwave?
Surprisingly your average microwave can work quite well as a dehydrator. By microwaving a vegetable low in 3-minute bursts you can achieve a fully dehydrated herb or veggie in under 20 minutes. However, you risk sacrificing a lot of flavor by using this method.
Because of the nature of the microwave you are essentially boiling away the internal water of the basil while it cooks. This will result in flavorless dried basil leaves that is far less tasty than even the cheapest store-bought basil.
Tips for growing and harvesting your own basil.
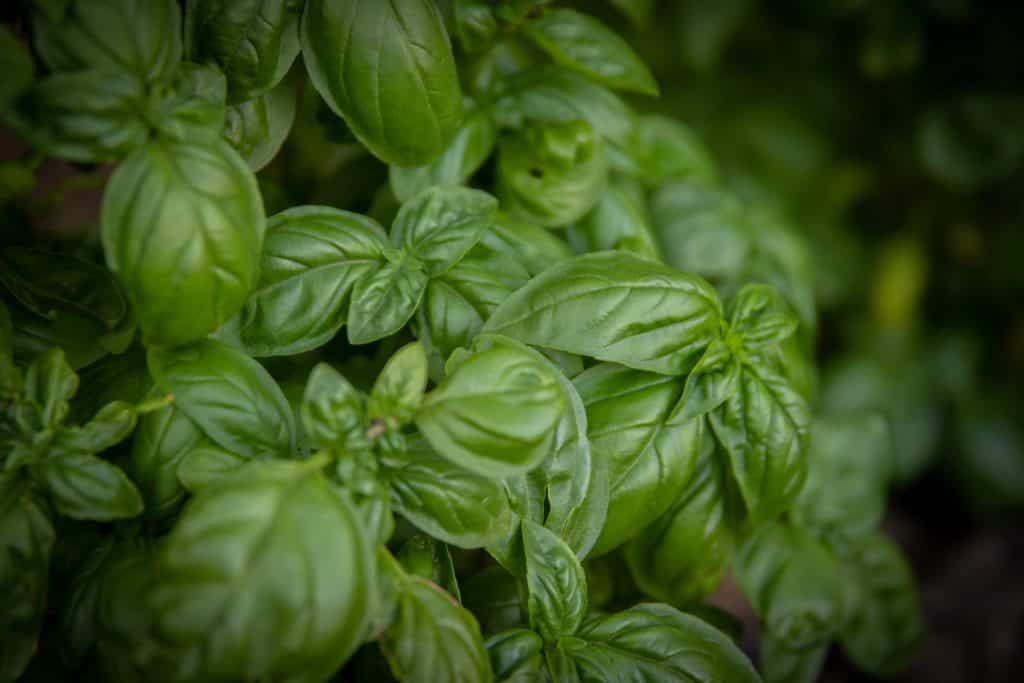
There is truly something special about fresh summer basil. Maybe it's because it's so easy to grow, or because it goes so perfectly with all the other summer vegetables like tomatoes and corn, but growing your own basil can be incredibly rewarding.
Whether you're keeping a large garden plot in the back yard, a small potted garden on your deck or a window box with just a few herbs here are some tips that can help get the most out of your basil crop this year.
1. Grow multiple basil plants.
It's easy to over harvest from one plant when that's all you have available. By keeping multiple basil plants around you can ensure you always have some ready to harvest.
2. Allow your basil time to grow before harvesting.
Gratification deference can be hard, and when you first plant fresh basil it can be incredibly difficult not to go out and harvest some leaves as soon as possible. Try to hold off until the basil plant is at least 6" tall to ensure it can sustain regular harvesting of its leaves.
3. Don't over harvest.
You should never take more than ⅓ of a total basil plant at one time. Harvest your leaves from the top of the plant whenever possible, and try to take only as much as you need for a single recipe. Basil leaves will continue to grow if left on the plant but will only begin to deteriorate after they're picked.
4. Wash your basil.
It's important to wash fresh herbs and veggies, both to remove any grit or dirt, but also to rinse off any fertilizers you may have used. Basil is no different in its need for a bath after harvest, but you're going to want to be careful when washing it.
I like to gently dunk my basil leaves in cool water before removing it and carefully removing as much surface moisture as possible. I like to use a small salad spinner sometimes to help remove the excess water as well. Once the basil is as dry as possible try to store it wrapped in dry paper towels in the crisper drawer. This will help maintain the best structure possible in your basil leaves and keep them from wilting.
Where and when to use your dried basil.
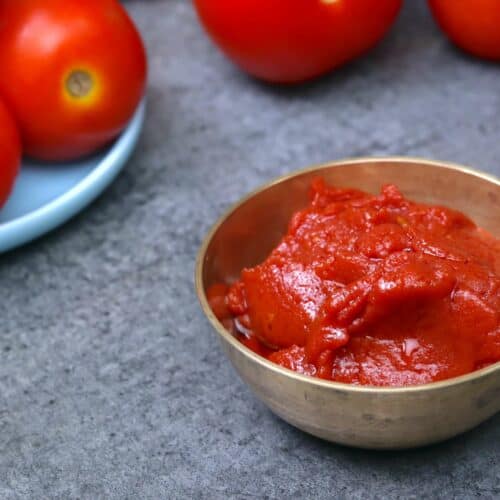
Dried basil is just as versatile as fresh basil, but there are definitely recipes where you wouldn't want to substitute one for the other. While you can use dried basil in pasta/pizza sauce, in salads or salad dressings, as well as in soups, or stir-frys, you wouldn't want to substitute it for fresh basil in a pesto recipe or a Caprese salad.
Dried basil leaves work great in marinades, or dry rubs and are the perfect addition to any soup or stew. I love adding my own dried basil to my pasta sauce or sprinkling a little bit over fresh feta and cucumber salad with sun-dried tomatoes.
However, you choose to use your dried basil you can be sure it will be much more flavorful than any store-bought basil you might find!


Leave a Reply