
If you’ve landed on this page, you’re either eyeing a carbon steel pan or already have one and want to know how to keep it in perfect shape. Luckily, this chef-favorite type of pan is a breeze to care for—and seasoning it isn’t as nearly as hard as seasoning a cast-iron skillet.
Today, I’m going to tell you my tried-and-true steps for how to season carbon steel pan sets. Trust me, it’s worth going the extra mile here.
Table of Contents
Seasoning: What and Why?
Before we get into the guide, let’s get a few things out of the way.
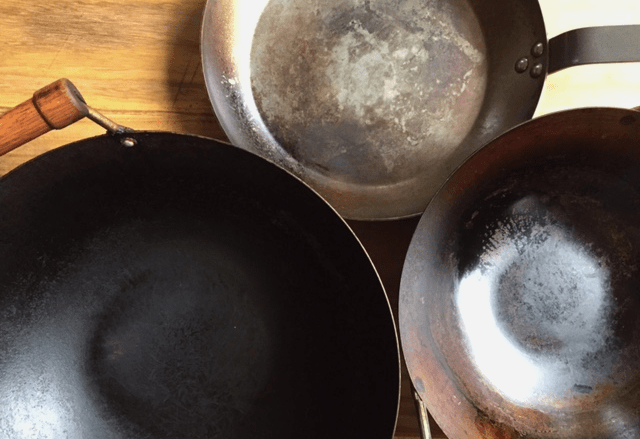
For starters, seasoning isn’t some type of flavor built up over the years on carbon steel pan sets. Rather, it’s a thin layer of oil (or, better yet, several layers) that has been treated and transformed into an even protective coating. Cast iron pans and cast iron skillets are also seasoned. You’ll easily see if your pan is seasoned if it looks dark brown (instead of light gray).
Secondly, this protective coating is extremely important when you’re cooking with carbon steel pans. It protects your cookware from getting rusted when it gets wet or humid. If it weren’t there, you wouldn’t be able to use your carbon steel pan sets. Plus, the seasoning makes your pots and pans non-stick, meaning your food won’t burn to the bottom as easily—and that you can clean your cookware with very little effort. It's perfect for making a stir fry. (If you've always wanted a nonstick stainless steel pan but didn't like the poor heat retention, this is an excellent alternative).
See how useful seasoning a carbon steel pan is? Let’s look at how you can create your protective layers at home.
Step 1: Clean Your Carbon Steel Pan
Step one is obviously very important. If you haven’t used your new carbon steel pan yet, look at the box it came in. Does it say the pan comes pre-seasoned? If it does, you can use it right away for a while until it’s time to reseason it. (Keep reading until the end of this article to know when you need to reapply the protective layer).
Yet, if your new carbon steel pan doesn’t come already seasoned, you’ll need to wash it with hot water and a steel wool sponge before we move on to the next steps. Make sure to also make a mixture with dish soap. That’s because manufacturers apply a wax coating to the surface of their pans before they send it out. As you can probably guess, this layer protects your precious cookware from rust in the warehouse and during shipping. Washing it off with soapy water is a must.
Luckily for you, removing this layer isn’t that complicated. You can either follow the manufacturer’s instructions or follow this detailed guide on how to clean carbon steel pan sets I wrote. Don’t forget to pat it dry with a paper towel or microfiber cloth!
Step 2: Start Heating Up the Pan
Once that’s done, there are two ways of seasoning your pan you'll have to choose from: either follow the oven method or the stovetop method. In other words, you’ll have to heat the pan in the oven or on a gas stove. Which one you choose is entirely up to you. Just keep in mind that following the oven method will take significantly longer and you may have a harder time getting rid of the smoke in your kitchen. Moreover, not every pan has an oven-safe handle, so make sure yours does if you want to use the oven.
Regardless of which method you follow for the initial seasoning, you’ll want to get the pan searing hot. This should take you approximately 10 minutes on a stovetop on medium-high heat or 10 minutes in a pre-heated oven to 400 degrees Fahrenheit.
Step 3: Apply a Layer of Oil Lightly
As your pan heats, get old dishcloths you don’t mind getting ruined. You can also use a paper towel or two if you prefer.
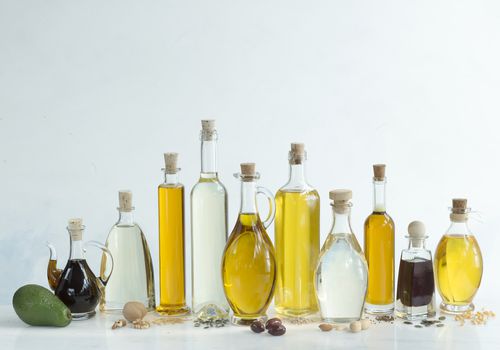
Then, pour a small amount of a neutral oil with a high smoking point on it. In other words, the oil should have no flavor and should only burn at high temperatures. The best for the job are vegetable oil, soybean oil, corn oil, refined sunflower oil, canola oil, and grapeseed oil. I do not recommend using avocado oil, peanut oil, coconut oil, olive oil, butter, vegetable shortening, lard, or flax seed oil—all for a variety of reasons, as they won’t get you the smooth and consistent season layer you want.
This probably goes without saying, but be very careful when applying the layer of oil. It’s best to wear oven mitts to hold the pan and use tongs to hold the dishcloth or paper towel. Wipe the pan with the oil, making sure to cover the entirety of the pan surface, as well as under the pan.
Let me emphasize that you should use the oil sparingly for this first layer. Don’t let any excess oil pool in one area of your pot, as it will create a bumpy and uneven seasoning layer. Wick up the excess with a paper towel. The layer should be smooth (unlike what happens with a seasoned cast iron pan or cast iron skillet).
Step 4: Burn the Oil Layer
Now, if you’re using the gas stove method, turn it up to high heat. Let the pan sit in the center of the gas burner. Make sure the heat is reaching every part of your pan evenly. If your burner is small in area, you may have to move the pan around (while wearing your oven mitts!) every once in a while to get a consistent layer.
If you’re using the oven method, slide a lined baking tray or baking sheet onto the bottom rack. This will catch any excess oil that drips down from your pan. Then, slide the carbon steel pan into the middle of the oven on top of a lined baking sheet pan or wire rack. This will also ensure an even layer of burnt oil. Don't forget to wear your protective oven mitts.
You will need to leave your carbon steel pans on the heat until that first layer is fully transformed into the protective coating we want. This process can take anywhere from 15 to 50 minutes, so you’ll have to keep an eye on your pan. Fortunately, it’s very easy to know when the seasoning process is done: as soon as it stops smoking, it’s done and you can turn off the heat.
Warning: Work in a Well-Ventilated Kitchen!
Yes, you read that right. Your beloved pan will smoke while you’re seasoning it. This happens to every cookware piece we season (from cast iron skillets and cast iron pans to baking sheet and tin plate pans) and it’s completely normal, so don’t freak out!
You do, however, need to worry about ventilation. The smoke shouldn’t be potent enough to stink up the room (that’s why I recommend you choose a neutral oil such as vegetable oil) but it has to go somewhere. If you’re using the oven, make sure to turn on the built-in extractor fans. If you’re using the stovetop, turn on the exhaust hood. It’s also a good idea to open your kitchen windows, as this will help you ventilate your home. This goes for every time you season anything (i.e. cast iron and so on).
Step 5: Check the Layers and Repeat the Process
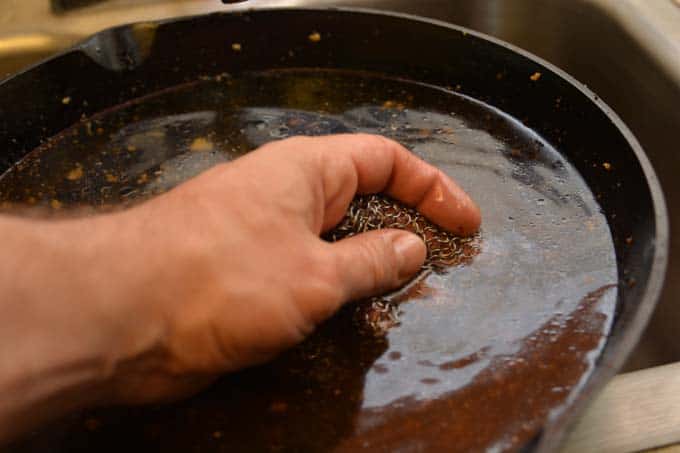
Once the first layer is perfectly burnt into the pan, it’s time to check if you’ve done a good job. Let the pan cool completely to room temperature and run your fingers through the surface of the pan. Do you feel any bumps? Does the layer feel thicker in some areas than in others? If your answer to these questions is yes, you’ll need to undo all the work you had and try again. I know it’s frustrating, but as you get more practice, your seasoning seal will get more even!
If it feels right to the touch, it’s time to move on to the next step: repeating the seasoning process. Fun, right?! I aim for applying 3 to 4 layers of oil to my carbon steel cookware, but yours may need fewer or more.
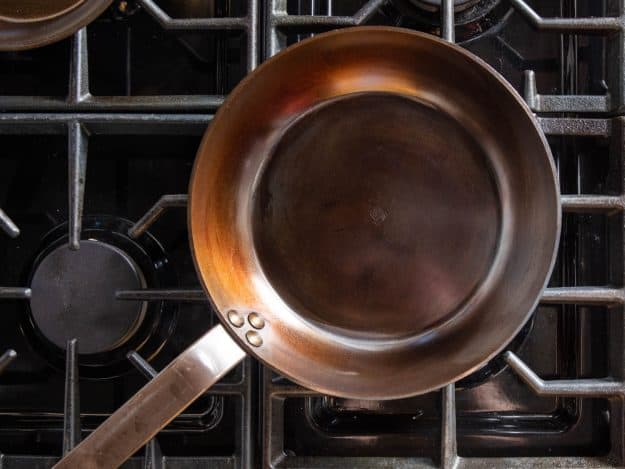
Keep in mind that a well-seasoned pan will look dark brown. That’s what you need to be aiming for. A new carbon steel pan that has never been seasoned is gray or silver in color, so the more you season a carbon steel pan, the darker it gets.

Overall, this is a pretty simple guide to follow. Having a more modern stainless steel skillet may be less demanding, but it doesn't beat this type of steel! Of course, seasoning carbon steel pans takes some practice, but it's really not as complicated as it's cracked up to be. You surely won't need to do the popular but time-consuming kosher salt and potato peel method. Leave those potato peels for other things—such as a delicious snack, a nutritious Chinese stir fry, or even the compost.
How Often Should I Season a Carbon Steel Pan?
How often you have to apply a seasoning coat depends on a lot of factors. For starters, if you don’t cook with your pan often, the seasoning will likely wear off while the frying pan isn’t in use. Secondly, if you’re very rough either cooking utensils or cleaning tools, the seasoning could wear off prematurely, too. Plus, how often you season a carbon steel pan will also depend on how good of a job you did and on the quality of your cookware.
Thus, you’ll have to check your pan before you use it to see if it’s in need of seasoning. Here are some signs to look out for:
- Bumpy or bubbly coating on the cooking surface.
- The brown color is wearing off in some spots but not in others.
- Your pan is losing its nonstick properties and there is burnt food residue at the bottom.
When you spot those and get the time, it’s time to follow this guide from step one all over again. With time, this will become second nature to you.
Pro tip: To keep your seasoned pan good for longer, don't stack other things on it. If you absolutely must (to save space, for example), make sure to line it with a paper towel or two to minimize friction.


T.L. Francis
Just purchased a 10" MISEN CS pan. Using the oven method, (I have electric burners 😒), I'm on my 4th seasoning effort. One more and I'll be ready to go!!