
Dull knives are no fun (see what I did there?). But sharpening kitchen knives doesn’t sound like any home cook’s idea of fun either. I think that’s mostly because “pro” cooks love making this task sound harder than it actually is. In reality, you can sharpen your knives easily and quickly—if you know what you’re doing.
This article is exactly that: a guide telling you how to sharpen kitchen knives at home following three different methods. We’ll go over how to use a sharpening knife steel rod, an electric knife sharpener, and a whetstone—as well as cover some tips to keep your sharpened knives sharp for longer. Keep reading to get the full scoop.
Table of Contents
The Biggest Kitchen Knife Sharpening Secret
Before getting to the sharpening process, there’s one thing you need to do: look for the dull part of your blade. For example, your knife could be dull near the tip or near the bolster. Once you know where your dull knife’s weakness is, you’ll know what spot to concentrate on. This will ensure you get a new, perfectly sharp cutting edge where you need it.
Keep in mind that the material your knife is made of (carbon steel, stainless steel, and so on) doesn’t matter for this part.
How to Sharpen Kitchen Knives, 3 Ways
Now, there are three main methods of sharpening knives.
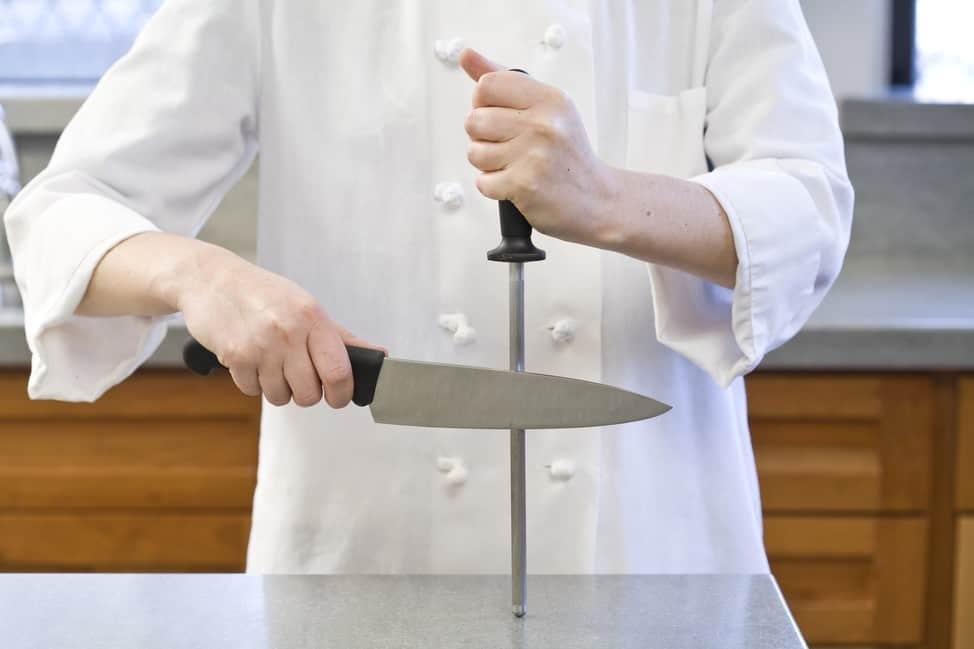
Using a Honing Rod
First, you can use a honing rod. Sure, pro cooks will tell you you’re not actually sharpening the blade, but honing it. In other words, you’re not eating away at the steel of the blade to create a new edge. Rather, you’re straightening the already bent edge (yes, it’s on the microscopical level) so that it cuts more easily through food.
All that to say that, if you’re in a pinch, you can use a honing rod to make your knife cut like it used to. No one has time to sharpen their knives every week, especially not home cooks, so this is a perfectly acceptable solution.
Grab your sharpening steel and hold it with the tip resting on your counter or chopping board.
Next, grab your dull knife and hold it so that the side of the blade and the honing rod form a 20-degree angle.
Then, quickly pull the knife toward you and repeat this motion the same number of times for each side of the blade. Keep going until you feel your knife is sharp enough.
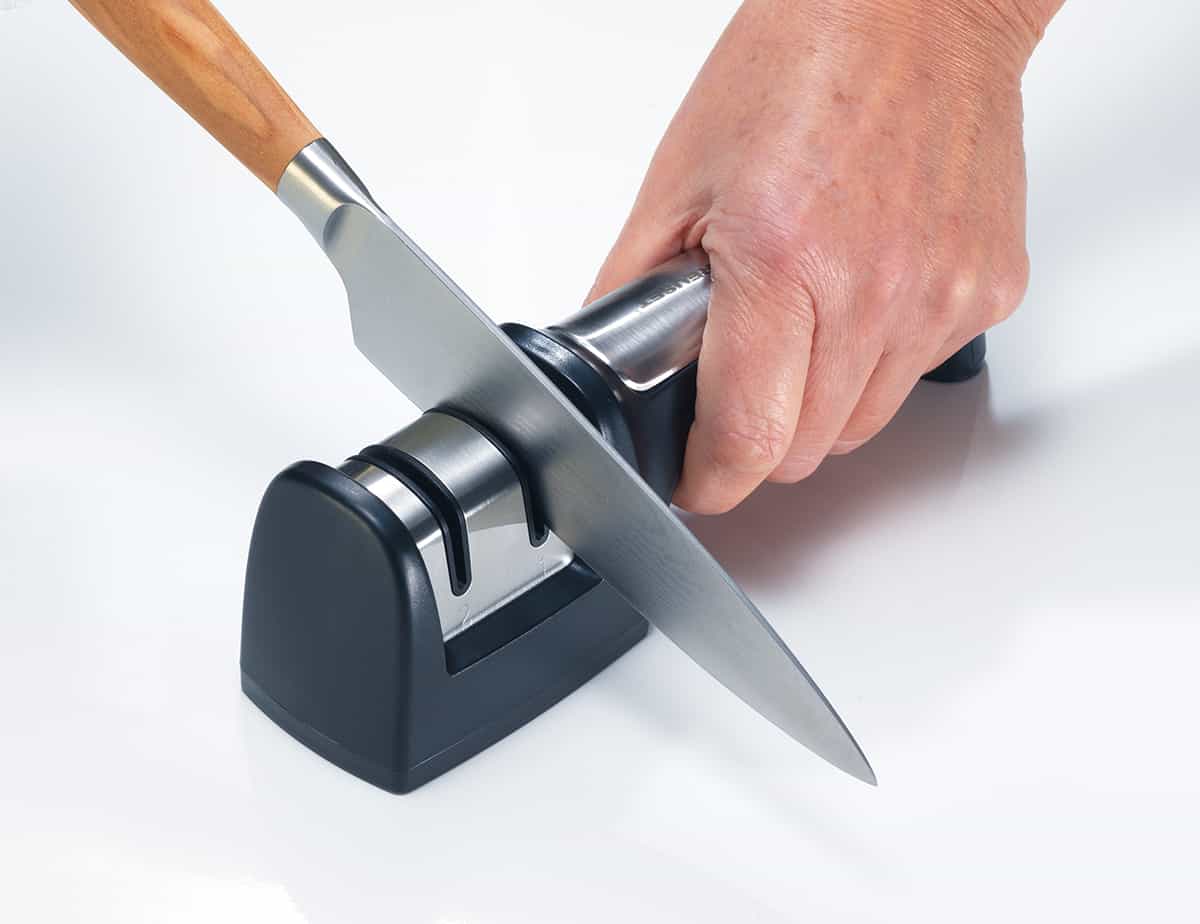
Using Electric Sharpeners
If you want to invest some money into your knife skills, getting an electric sharpener is a great move. These small kitchen appliances sharpen knives perfectly and are incredibly easy to use. Electric sharpeners great for when you have a bit of time to actually sharpen (not just hone) your dull knives.
First, lay your electric knife sharpener on the counter and turn it on.
Then, get your blunt knife and run it through each of the slots about three or four times, making sure not to press down the blade and to pull it toward you slowly. You should always run each side of the cutting blade the same number of times to ensure it’s equally sharp on both sides.
To finish off, all you have to do is run the blade through the “buffing” slots the same way you did before. And that’s that!
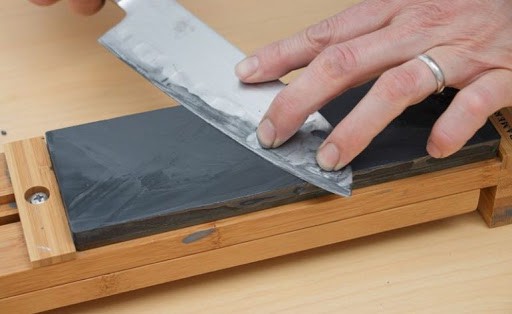
Using a Whetstone
Lastly, you could go for the pro pick and get yourself a whetstone. This small appliance works a little like sandpaper: you’ll use the friction offered by the sharpening store to eat away at a thin layer of steel in your knife’s blade. When it’s done, you’ll have a new exposed edge that is sharp and cuts through anything you need it to.
Step 1 is placing a damp kitchen cloth on your kitchen counter and laying the whetstone on it with the gritty side up.
Step 2, Grab your kitchen knife. Keep your thumb on the top of the handle and your index finger resting on the spine of the blade.
Next, step 3, prop up your knife, with the tip away from you, at a 20-degree angle with the sharpening stone. You’ll need to keep this angle throughout the entire sharpening process.
Then move on to step 4: With the fingers of your other hand resting on the blade, push the knife forward and across the whetstone. Repeat this motion four or five times, then rotate the knife and focus on the other blade side.
Once you’ve done all that, get to step 5 by flipping over the whetstone and repeat the same motions at the same blade angles on the smooth surface. This will polish the now-sharpened blade and get it ready for you to start using it in the kitchen again.
Keep in mind that some sharpening stone models require you to wet them before you start sharpening. Others will get damaged if you do this. Make sure to check the manufacturer's instructions to know what to do.
What Is the Best Kitchen Knife Sharpening Method?
Which knife sharpening method you choose is all up to you. They all turn a dull knife into a like-new sharp kitchen knife, so it all boils down to personal preference.
Honing steel is best for when you don’t have the time to properly sharpen a knife but you still want to cook in the kitchen (for example, if you’re in the middle of preparing dinner).
Electric knife sharpeners are your best friend if you have some money to invest, enough room to store it, and you value convenience and ease above all else.
Whetstones, on the other hand, are great if you’re struggling to find room for all your kitchen appliances and want to learn a skill that’s valued by top chefs (and pretty cool to show off to friends at dinner parties, let’s be honest).
How Often Should You Sharpen Your Kitchen Knives?
You should sharpen your knife as soon as you notice it doesn’t cut through ingredients quite like it used to. As you get more experience in the kitchen, you’ll be able to tell instinctively which knives need sharpening and which don’t. But to tide you over until then, you can try these two fail-proof tests.
The Paper Test
Get a piece of paper and hold it vertically. Then, slide down your kitchen knife through the paper.
If it cuts through effortlessly, it doesn’t need to be sharpened. If it crumples up the piece of paper, it’s time to sharpen it.

The Tomato Test
Another test you can do is the tomato test. Get your knife and slice through a tomato with every part of the blade, from the knife tip to the heel. Apply as little pressure as possible.
If you can cut through the tomato skin without bruising the tomato, you have a sharp knife. If you notice the blade doesn’t slice through the skin easily, you need to sharpen it.
This trick also works with other fruits with thin skin, for instance, plums.
Tips for Keeping Your Sharpened Knives Sharp
Sharpening can be fun, but there’s no reason to sharpen your blades all the time. If you do apply three tips to your kitchen, your knives will stay sharp for much longer.
Store Your Knives Carefully
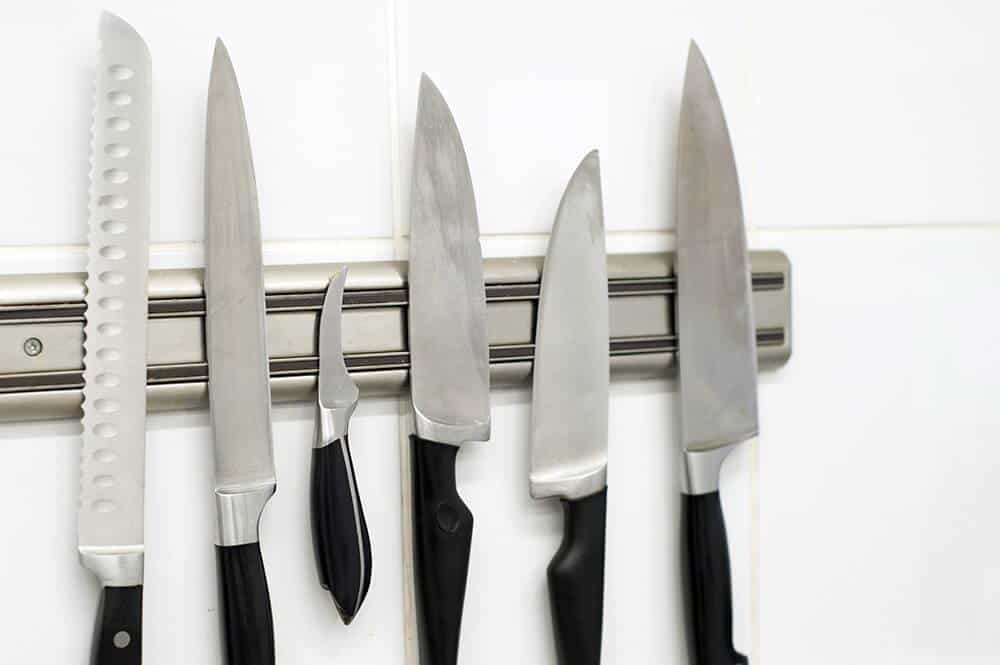
Having sharp knives clanking around in your kitchen drawer isn’t a good idea. Not only can you cut yourself, but the edge on your blade will wear out very quickly. Moreover, for the same reason, knife blocks may not be great either, seeing as the cutting blade frictions against the wood in the slot quite frequently.
Instead, you should invest in a magnetic knife holder to put up on your wall. There are also some great countertop models that would be great choices. Alternatively, you can keep storing your knives in the drawer if you first place the knife guards on them.
What’s good about these storage methods is that they keep the sharp blade edge from hitting or grinding on other objects. Thus, the new edge isn’t “eaten through” as quickly.
Use the Right Kind of Cutting Board
A sharp knife repeatedly hitting a cutting board that’s too hard (for instance, one made of very hard wood or glass) will quickly chip and lose its sharpness. To avoid that, you should get a high-quality cutting board designed to keep your knife’s blade safe. You’ll find models at all price points, so you can be sure there is one for your budget.
Always Handwash (and Dry) Your Kitchen Knives
Lastly, you should always handwash your kitchen knives. Even if your knives say they’re dishwasher-safe, their edge will wear out fast if you run them through a normal cycle on a packed dishwasher.
Run them through hot water, scrub them with a soapy sponge, rinse them, and towel dry. It’s easy and worth putting in the 5 seconds this takes.


Leave a Reply