Panini sandwiches are one of those foods that look and sound fancy and complicated to make, but they’re really one of the easiest snacks or means you can make in your kitchen. If you know how to make a grilled cheese sandwich, you are ready to up your game and start feasting on paninis. All you need is to know how to use a panini press.
In this article, I will go over the steps you need to take to use your panini maker. Trust me; it’s ridiculously easy. Plus, at the end, I will leave you some suggestions so you can let your creativity run free and make even more things with your panini press.
Table of Contents
Step 1: Plug In Your Panini Press
First off, make sure your panini press is nice and clean. Wiping it down with a clean dishcloth will do the trick.
Then, plug it into an outlet so it starts working. Depending on what kind of model you have, you may have to set the temperature of your cooking plates. If this is the case, just select whichever medium-high temperature your model allows for. It should be in the 350ºF neighborhood.
Step 2: Coat the Griddles with Oil
The second step is getting some oil on the cooking surface of your panini press. I find this helps your food not burn to the plates or get stuck. Of course, this step is completely up to you if your model has nonstick plates. However, you will probably find that the added oil browns your panini sandwich perfectly.
If you do decide to follow this step, you can pour some olive oil on a paper towel or reusable towel and wipe it all over the griddles—both the top and bottom ones. A more mess-free alternative is to coat the griddles with cooking spray.
Step 3: Let Preheat
You should then close the lid of your panini press and allow the cooking plates to heat. This will make your bread crispy, which will contrast well with the warm and soft fillings.
Most modern panini presses come with a built-in indicator light that turns green when the plates are hot enough.
If yours doesn’t have this indicator light, that is okay. The griddles should take between five and seven minutes to heat. You can also splash a few drops of water on the plates; if it quickly turns to steam, you know they’re hot and you can start cooking.
Step 4: Assemble Your Panini
Now comes the fun part: assembling your panini. Take advantage of the time it takes for your panini maker to heat to start gathering all the ingredients and putting them together.
First, pick your favorite sandwich bread. Then, pick your protein, veggies, and seasoning or sauce. The options here really are endless. If you can think of a flavor combination, you can try it (and I bet it will be delicious). Just remember to put any wet ingredients (tomato, for example) in the middle layers of the sandwich so the moisture doesn’t drown the bread.
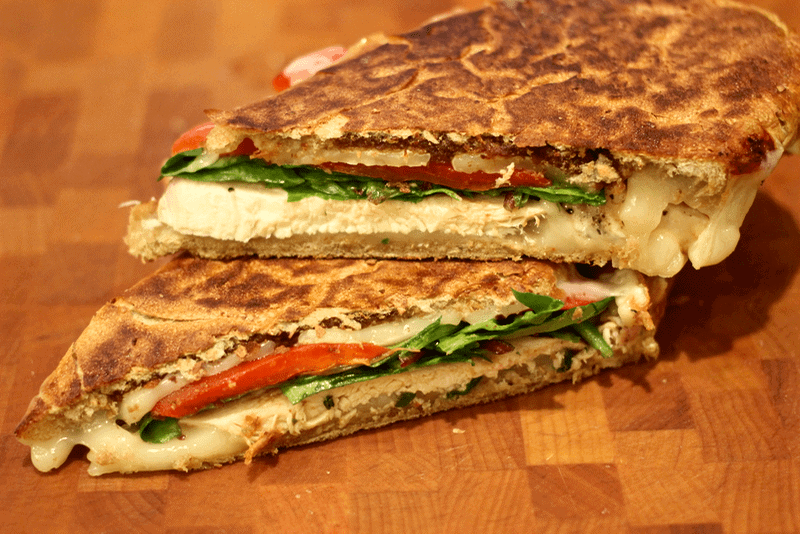
For instance, you could try two slices of sourdough bread with two chunks of chicken breast, tomato slices, and fat slices of fresh mozzarella cheese. If you want to make this sandwich even better, a dollop of pesto will go delicious in it too. Grilled cheese and chicken panini, anyone?
Pro Tip: Don’t Overfill It!
You do you, but don’t overfill your sandwich. If you do, the fillings will likely spill and make a big mess.
Step 5: Let Cook
When your panini is on the cooking griddles, close the lid. Make sure you are applying force to the sandwich—it is a panini press after all, right?
Most panini presses come with a clasp to help you keep the lid shut. This will make those characteristic grill marks appear on both slices of bread.
Your panini should take between five and seven minutes to cook. You can check on the progress periodically. Ideally, the bread should be evenly browned and the cheese (if you used any) should have melted.
Step 6: Plate Up!
When you think your sandwich is ready, unplug the panini press. Then, gently remove it from the griddles using a plastic spatula. It’s important that you don’t use any metal utensils to get your sandwich off the press, especially if you have a nonstick panini maker. The scratching of the metal can peel off that nonstick layer and ruin your appliance.
Step 7: Clean
The final step is obviously cleaning! The good news is that cleaning panini presses is easy—you just have to know what you’re doing. Fortunately, we already have a comprehensive article going into detail about how to clean a panini press.
How to Hack Your Panini Press and Get Creative
You don’t have to use your panini press just to make sandwiches. There are a lot more things you can (and should!) try.
Grill Bacon
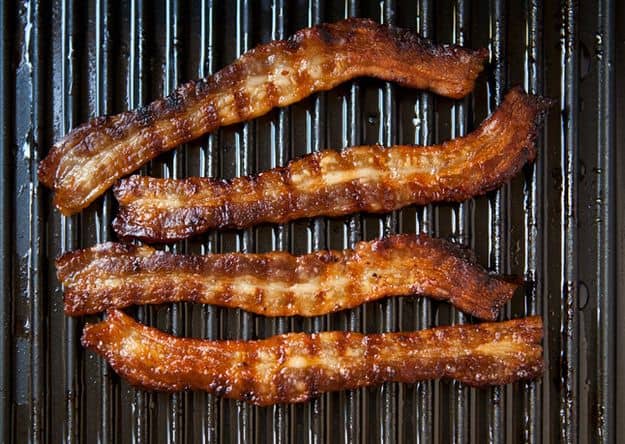
Let’s start with a crowd-pleaser. Grilling bacon is easy using a panini press. Follow steps one through three of our guide on how to use a panini press and then lay your slices of bacon on the griddle. Close the lid and let cook for three to five minutes. When the slices get to your preferred point of “doneness,” unplug the panini grill.
Toast Bread
Did you know you can toast bread without a toaster? If you are a college student living in a dorm and don’t have a reliable toaster, don’t fret. Preheat your panini press, lay the slices of bread on the griddles, and let cook for five to seven minutes.
Make Hashbrowns
Hash browns are one of the most popular breakfast foods and easy enough to make with simple kitchen appliances. You can make them with not only a waffle iron but also a panini press. Just pour the “batter” of shredded potatoes, butter, and seasonings on the griddle, close, cook for seven to ten minutes, and plate up!
Grill Veggies
A panini press can help fill the grilling-season-shaped hole in your heart. Slice a few bell peppers, onions, and asparagus and place them all on oiled and preheated panini press grill plates. Then, close the lid to get those grill marks. Cook for three to seven minutes and done!
Make Quesadillas
Lastly, you can also make a quesadilla using a panini press! Even though you would typically need a quesadilla maker (another simple, straightforward kitchen appliance), a panini press will do just fine, too. Pile on your freshly shredded cheese, let cook until the grilled cheese has all melted, and enjoy.
Warning: Don’t Get Overly Ambitious
Before I close this post, a few words of caution: don’t get too creative and grill just about anything. While technically a panini press could replace an electric countertop griddle, it may shut down if used for long, long periods of time.
So, if you want to cook fish fillets, chicken breasts, and other proteins, check that the center has reached a temperature that is safe for consumption. Otherwise, if the middle doesn’t cook, you could end up with a bad case of food poisoning



Leave a Reply